Are you looking for an alternative to your current Link in Bio tool like Linktree? If yes, you landed in the right place. With our brand-new landing page creator, you can also use Elastic Email to create a personalized page that houses all the important links you want to share with your audience. In this article, we will show you this extremely helpful usage of our landing page builder and show you step-by-step how to create your own page for the link in bio.
Table of Contents
Link in bio
How many times have you heard on Instagram or TikTok “Check the link in my bio”? We bet many times. If you're a content creator, we also bet you’ve said it many times. But let’s start from the basics - what a link in bio really is.
A link in bio is a clickable URL appearing in your social media profiles. It can lead to your website or a landing page with a set of links.
Link in bio - benefits and limitations
Adding a link to your bio on your social media profiles has many benefits. You can direct your audience from your social media to your website to increase its traffic and attract new customers. You can also increase sales by adding a link to your products and services.
But, you can only add only one link to your bio. It means that if you want to share more than one website, you have to use an external link in bio tool to aggregate a few links within one URL. And that’s where Elastic Email comes in.
Elastic Email’s link in bio feature
If you use our Email Marketing product, our brand-new landing page creator allows you not only to create attractive landing pages with web forms to generate new leads but also personalized landing pages that include all your important links in one place.
You don’t even have to have your own domain, because all our landing pages are created within the myelasticemail.com domain. You can add your subdomain and/or suffix to make it more targeted and personalized. Here’s an example of such a webpage:
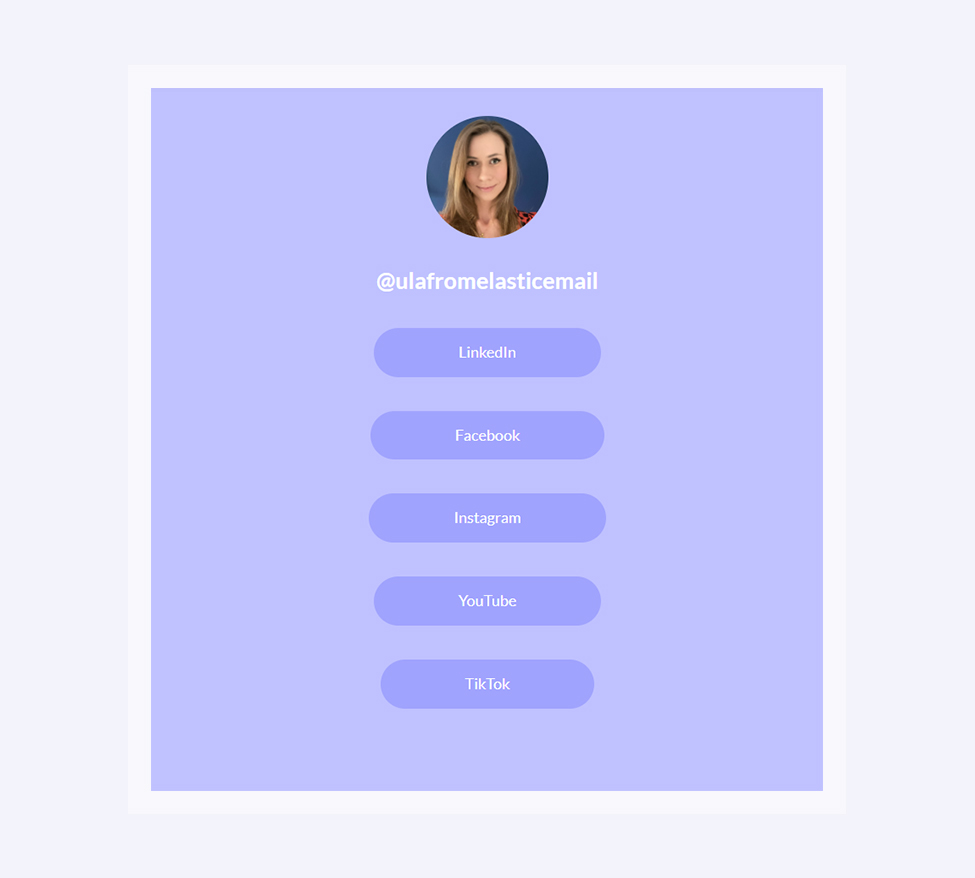
Let’s walk you through how to create a page to your link in bio, and you’ll see it’s easier than you think.
Design
Just like in our email designer and web forms creator, you create landing pages in a drag-and-drop editor. It means you drag and drop page blocks like Image, Paragraph, Spacer, Divider, or Button and adjust them to your needs.
You can style your link page as you see fit - fonts, colors of the background, buttons, and text, paddings, or even border-radius of the images and buttons.
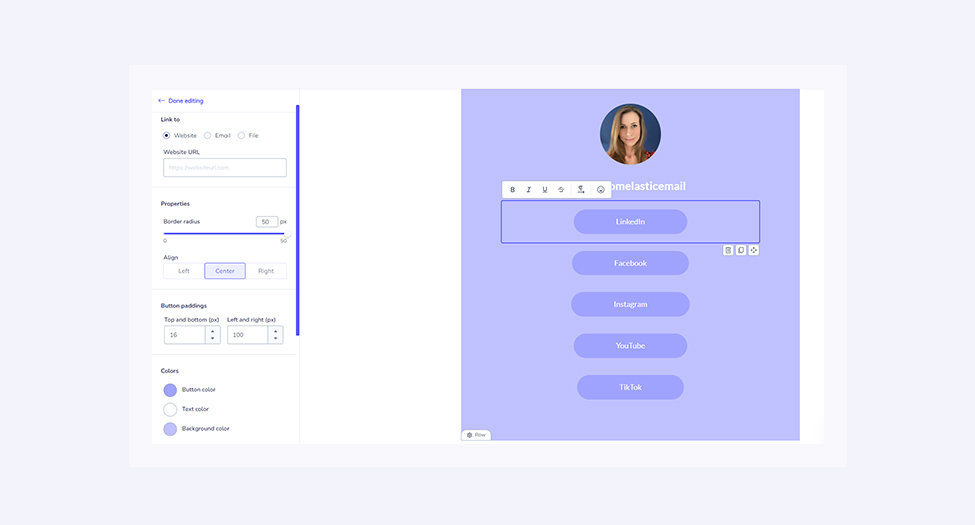
When adding buttons that will link to your pages, first of all, you need to add URLs, but our tool also allows you to edit the appearance of these buttons. From specifying the border-radius, through the color of the button itself, the text and background, to the text and button padding, as well as the font, its size, and letter spacing.
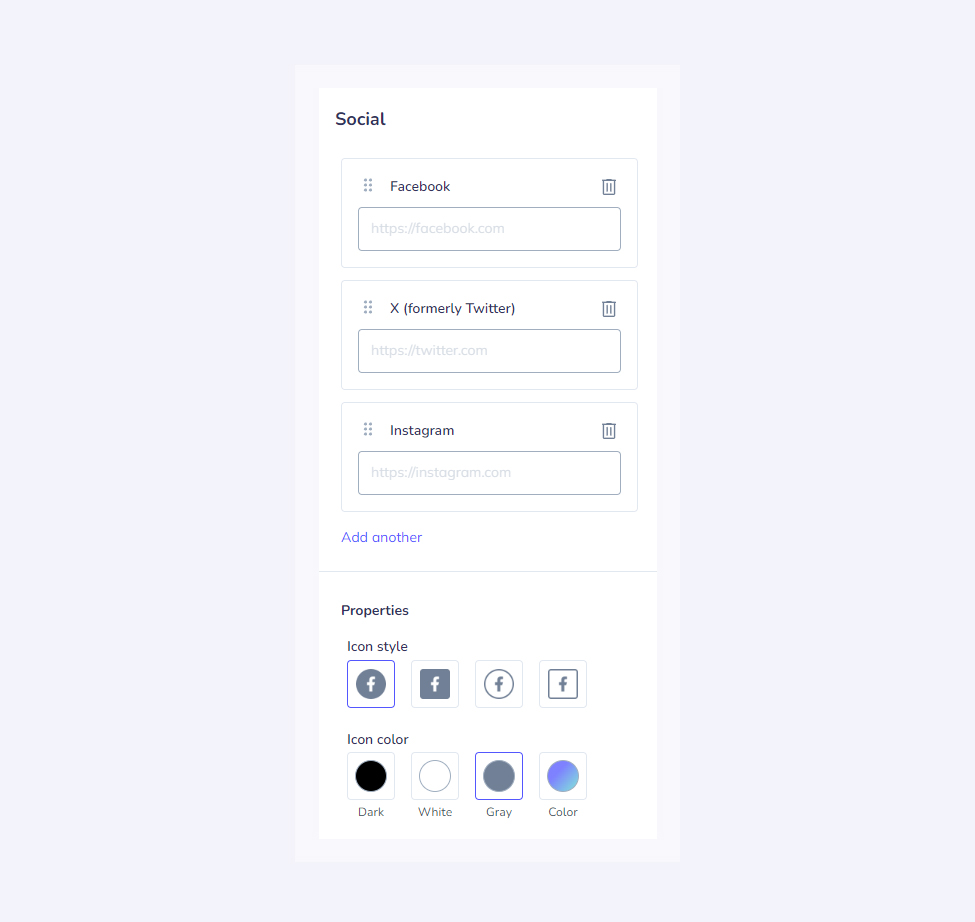
In the example above, you have buttons leading to social media channels, but if you want to link to other sites, and add social media icons at the bottom of your landing page, you can use the Social block.
When using it, you choose what social media profiles you want to link to and choose the icon style and color.
Publishing
Once your page for the link in bio is ready, we can move on to publishing it. As we already mentioned, your landing page will be created within the myelasticemail.com domain. But, you can customize it by adding your subdomain at the beginning and a suffix. For example, ula.myelasticemail.com/links.
Thanks to this, you can create multiple landing pages within the same subdomain and change the suffixes depending on the content of these pages. Of course, you can leave the suffix blank, e.g., ula.myelasticemail.com.
The only thing left to do is to add the link to your bio. If you add it on Instagram, it will look like this:

And there you have it. Your brand-new landing page with all the important links is created and shared as a link in bio. You can now attract your followers to click this link and visit your page and see what links to your amazing websites you prepared for them. Good luck!


