The Elastic Email platform is constantly evolving, and we are excited to announce we have just released the new web forms creator. Creating web forms has always been one of our features, but now, we present you with the updated, more convenient, and modern version of this functionality.
Let us walk you through how the new form creator works, what new elements you may expect to find there, and how to set up and publish your forms. Join us on this journey and see how smooth and user-friendly attracting new subscribers can be.
Table of Contents
- Brand new form designer
- Form block
- Adding reCAPTCHA
- Choosing your audience
- Convenient form settings
- Let it publish
- New web forms creator - wrapping up
Brand new form designer
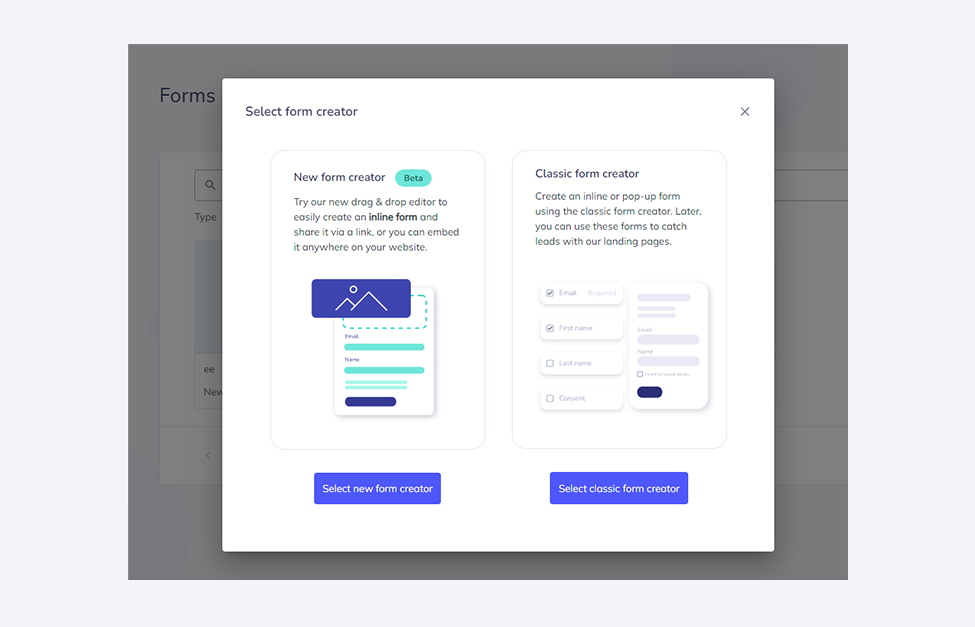
First of all, we want to point out that the old and new form designers will currently coexist in our application, so you’ll be able to access them both in the Forms screen of our app. You will find this screen in the Audience section of the left-hand side menu. When you want to create a new form, you will have to choose whether you want to create it in the new or classic form creator. If you want to use the creator to build a landing page, for now, you have to use its classic version. But, stay tuned - we are currently working to provide you with the new version of the landing page builder.
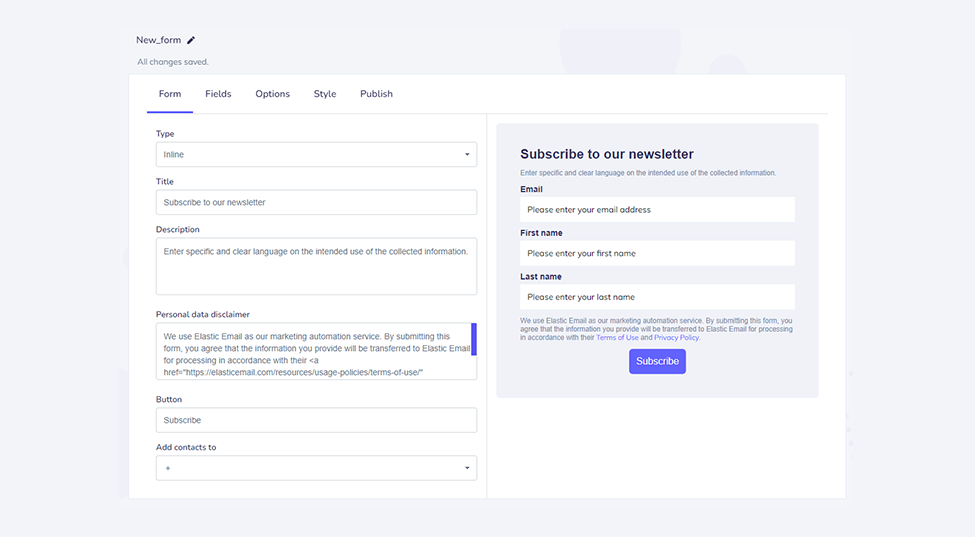
The first major difference is that we changed the entire flow of the web form creation. In the classic form creator, you started with the form creation and moved across different tabs to adjust fields, options, styles, and publishing settings as you can see below:
In the new forms creator, you start with naming the form and choosing whether you want to select a form from a gallery of the pre-made templates, or you want to create a web form from scratch.
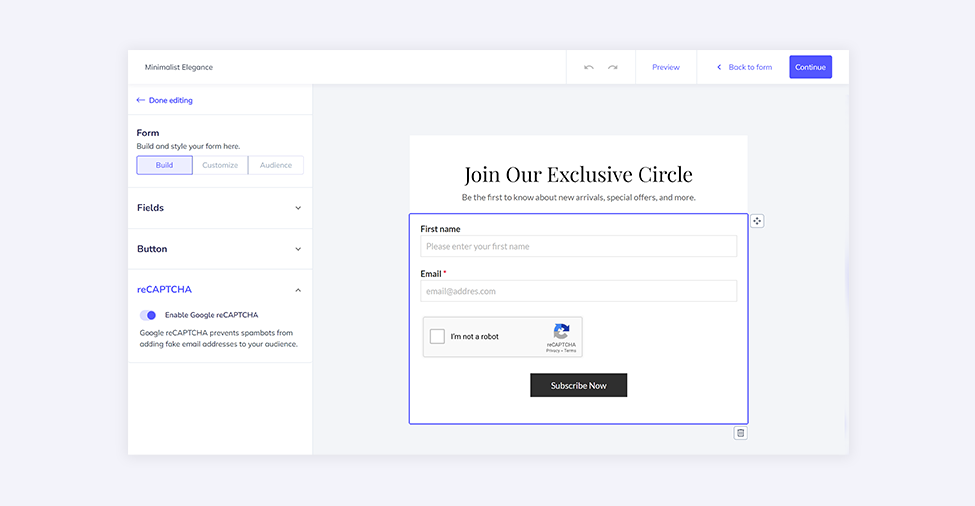
Our new form creator is based on a convenient drag-and-drop editor, just like our email designer. It means that you have different content blocks available in the left-hand side menu to drag and drop to your form. You can choose from Form, Heading, Paragraph, and Image. The Form block is available to be used only once in every form.
Form block
When editing the Form block, you can add the input fields, customize their style, and choose the audience your contacts should land in.
As for the fields, the Email input is always there, and it is marked as required by default. You can also add other fields like Name and Last Name. If you are on the Pro plan, you can also add custom fields like Birthday, Country, or Company, depending on what details you want to obtain from your leads.
Adding reCAPTCHA
When collecting new contacts, we all want to prevent bots from spamming our sign-up forms. That’s why it’s so crucial to add reCAPTCHA. In our new form creator, we added the option to enable Google reCAPTCHA v2 with the “I’m not a robot” checkbox in your forms (Pro plan).
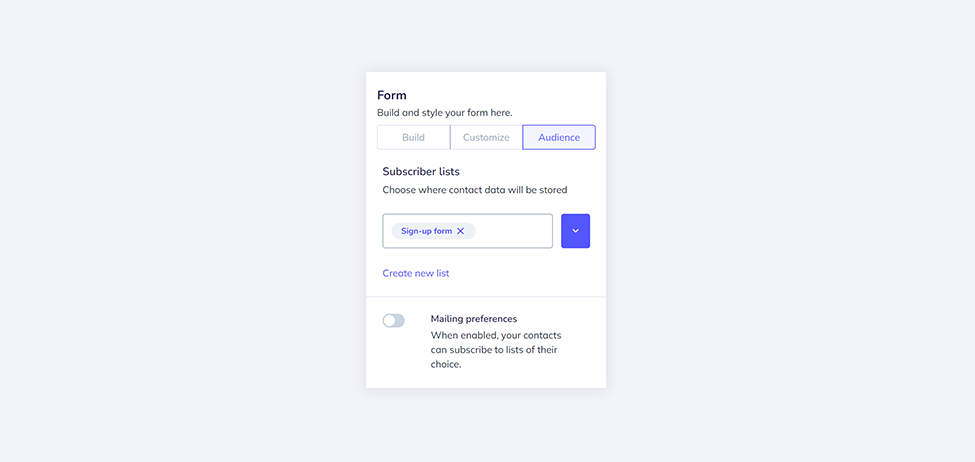
Choosing your audience
Last but not least, you need to choose where your freshly collected contacts should be added. Select the list(s) you want to add your leads to. You can even give them a chance to choose which list they want to be added to by enabling the Mailing preferences option. Your web form will include lists you provided and your leads can check to which of them they want to subscribe.
Remember, that you can only add contact to your lists, not segments. But, all contacts will be automatically added to the “all contacts” segment. At the same time, if you choose to collect information about, e.g., Country, and you already have a segment devoted to a certain country, contacts meeting this criterion will be added to that segment.
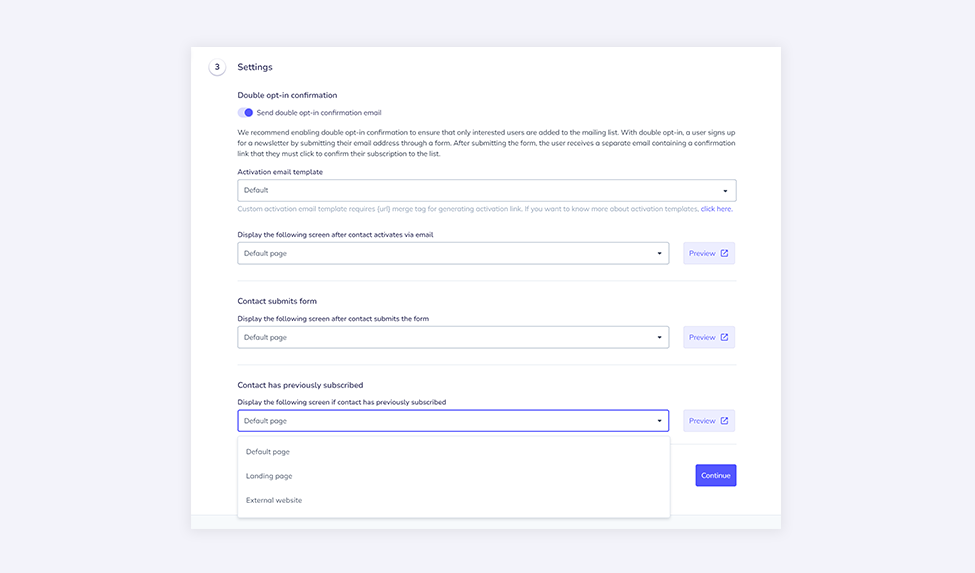
Convenient form settings
Once the form design is ready, it’s time to manage its settings. Please note that double opt-in confirmation is set by default on each form. In this section, you choose what screen should be displayed after a new subscriber submits the form. You also select what activation email template will be sent to them and what screen will be displayed once they activate via email. In case someone has already subscribed to your list, you can choose what screen will be shown to them. Don’t worry if you don’t want to design or choose anything. You can always choose the “Default” option, and all the pages and templates will be provided by our system.
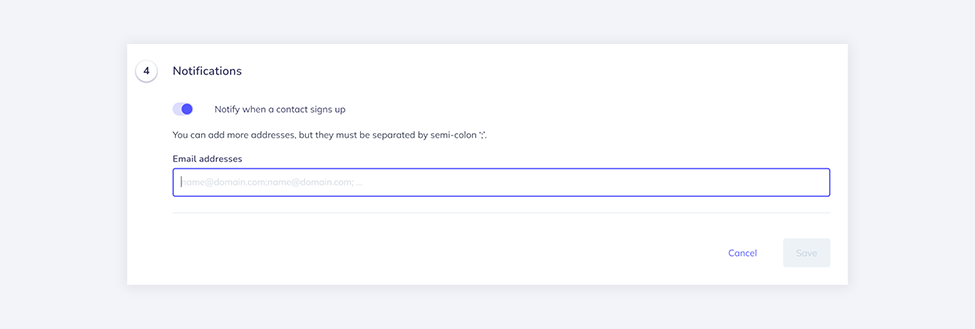
You can set up notifications to be sent to you when someone signs up for your list. All you need to do is provide us with the email address to which you’d like to receive notifications.
Let it publish
We’ve reached the final part of the new web form creator - publishing. You will have two options to choose from:
- Form link
- Scripted code to embed
The form link can be shared, for example, on your social media channels. You just need to copy and paste it. The second option is a script, working just like an HTML code, that can be copied and embedded in your website’s code.
New web forms creator - wrapping up
Collecting new contacts and building email lists is crucial for your business growth. That is why we hope our new web forms creator will make this process easy, effortless, and enjoyable. Discover our new form-building flow, see how smoothly our drag-and-drop editor works, and create forms tailored to your needs. Remember you can always use one of our ready-made form templates from the gallery in your account.
Test out our new web forms creator today, and if you have any questions or need additional assistance, reach out to our customer support team via email at support@elasticemail.com, or via live chat, which you can find in the bottom right corner of our website and platform. Enjoy!

Ula Chwesiuk
Ula is a content creator at Elastic Email. She is passionate about marketing, creative writing and language learning. Outside of work, Ula likes to travel, try new recipes and go to concerts.