Table of Contents
- How to add your SMTP credentials
- How to integrate Elastic Email with your e-commerce store via SMTP
- WooCommerce
- Conclusion
How to add your SMTP credentials
If you want to use our SMTP relay, you need to create credentials. When you enter Settings on your Elastic Email account, you have the SMTP box, in which you can create your credentials.

You will first type in your username, which defaults to your Elastic Email Account email address that you use to log in. You can use another email address, but it has to be unique across the entire system - just as with account email addresses.
After clicking the Create button, a pop-up will appear with your newly created SMTP Credential details - password, server, and port.
Password - You will get a unique password for your SMTP connection. Copy it and save it in a safe place. Once you close this window, you cannot retrieve it.
Server - You can either use smtp.elasticemail.com or smtp25.elasticemail.com.
Port - We support the following connection ports: 25, 2525, 587, 465.
We support TLS and SSL connections. Make sure the connection port you use is open on your own server.
How to integrate Elastic Email with your e-commerce store via SMTP
Let us walk you through the process of integrating your Elastic Email account with your e-commerce store via SMTP relay. We prepared the manual for Adobe Commerce (Magento), WooCommerce, and PrestaShop.
Adobe Commerce (Magento)
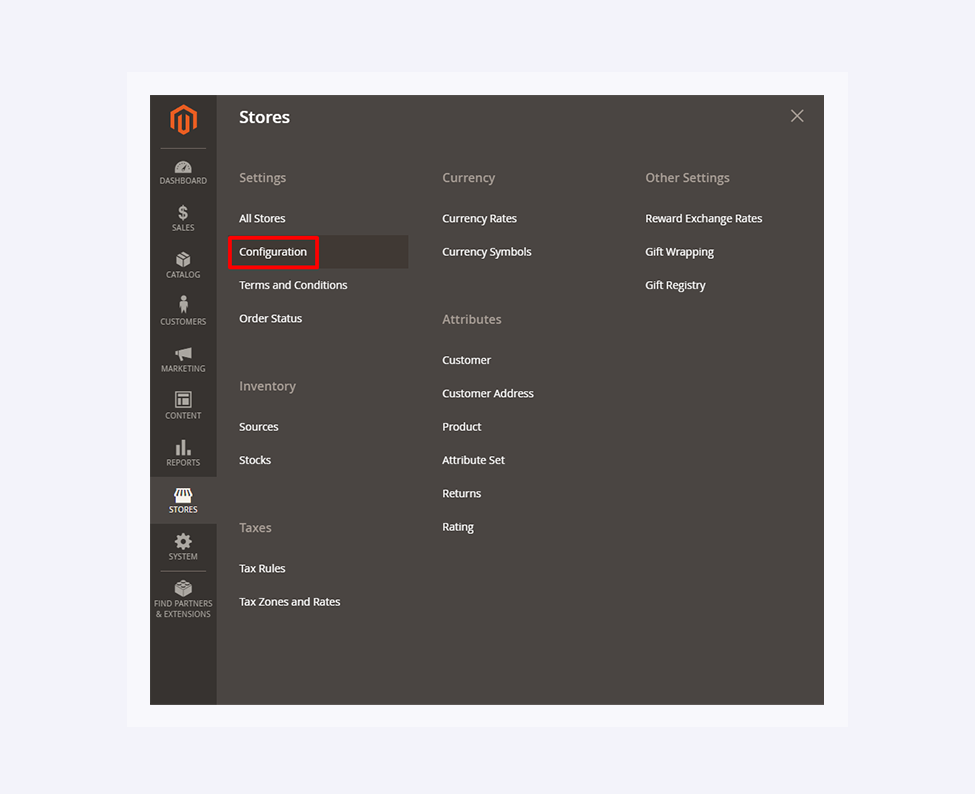
If you want to send emails in Adobe Commerce (Magento), you must configure your account to use an SMTP server. To do this, you need to input your credentials. First, log into your Adobe Commerce account, choose Stores, then Settings->Configuration.
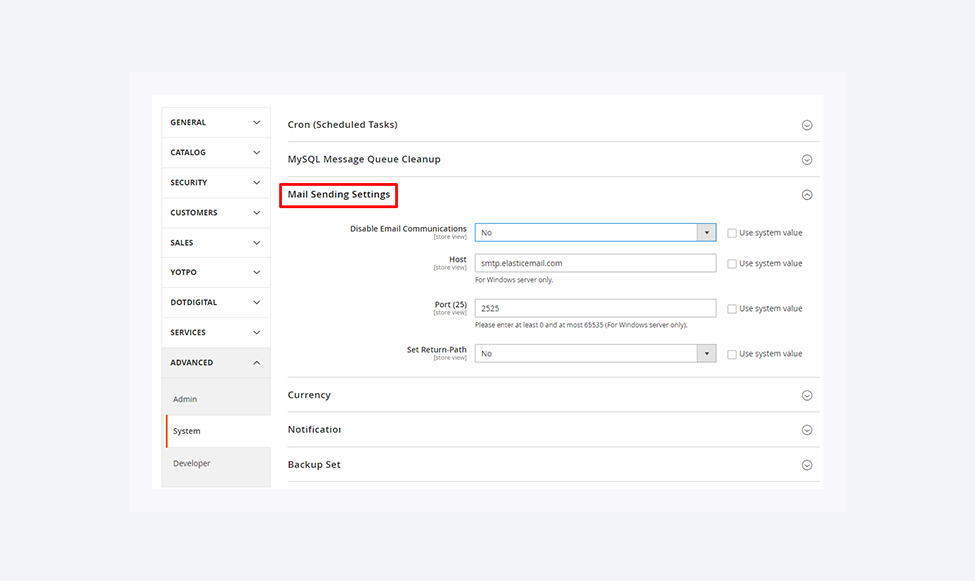
Next, you need to choose Advanced>System.

In the System tab, you will find Mail Sending Settings, where you can input the SMTP credentials. You must insert your SMTP server name - smtp.elasticemail.com, and port. The default port is 25, but you can add a different one, such as 2525.
Then, you need to copy in your local the file app/code/core/Mage/core/Model/Email/Template.php and enable that module.
The next step is to open the file Template.php and adjust the getMail() function:
public function getMail()
{
       if (is_null($this->_mail)) {
           $smtp_host = Mage::getStoreConfig('system/smtp/host');
           $smtp_port = Mage::getStoreConfig('system/smtp/port');
           $config = array(
               'port' => $smtp_port,
               'auth' => 'login',
               'username' => 'email@domain.com'
               'password' => 'yourpassword'
           )  ;
           $transport = new Zend_Mail_Transport_Smtp($smtp_host, $config);
           Zend_Mail::setDefaultTransport($transport);
           $this->_mail = new Zend_Mail('utf-8');
        }
        return $this->_mail;
}WooCommerce
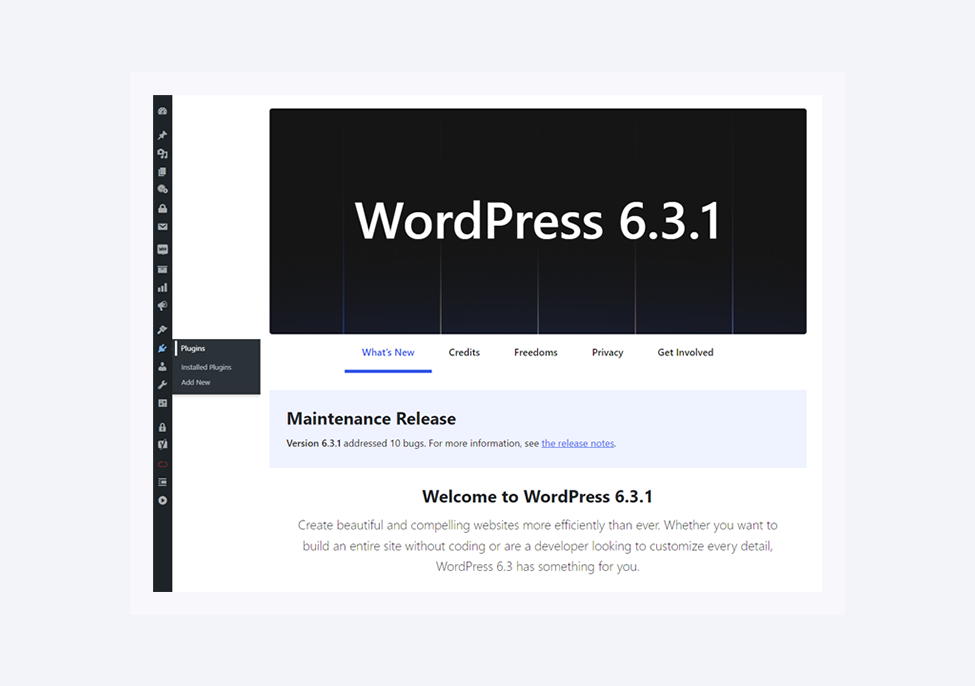
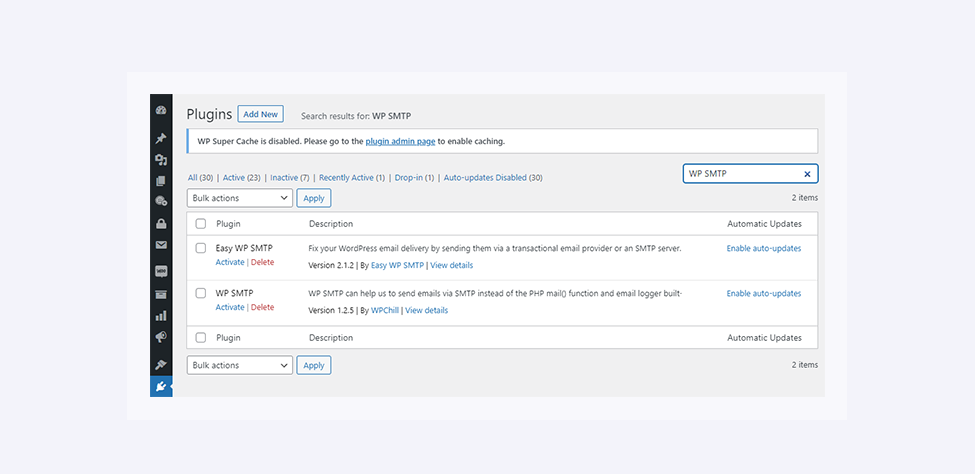
If you want to send your transactional emails via SMTP directly from your WooCommerce store, you can configure it on your server. Another option is to use an SMTP plugin on your WordPress account. You just need to log into your WP account and click on Plugins.
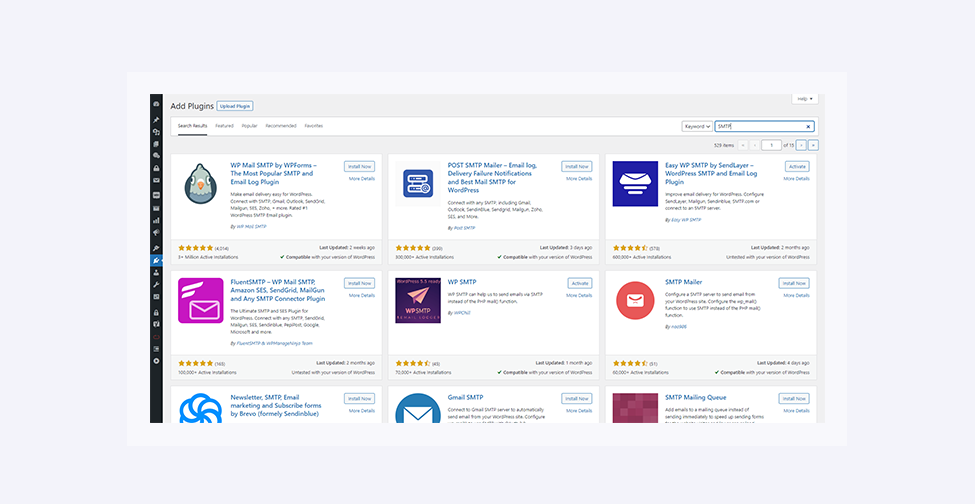
Then, you need to click on Add Plugins and insert SMTP in the search bar. You will receive a list of various plugins. You can choose whichever suits you more and start installing it. Today, we will show you all the steps in the example of WP SMTP.
Once you have the plugin installed, you need to activate it to be able to enter the settings.
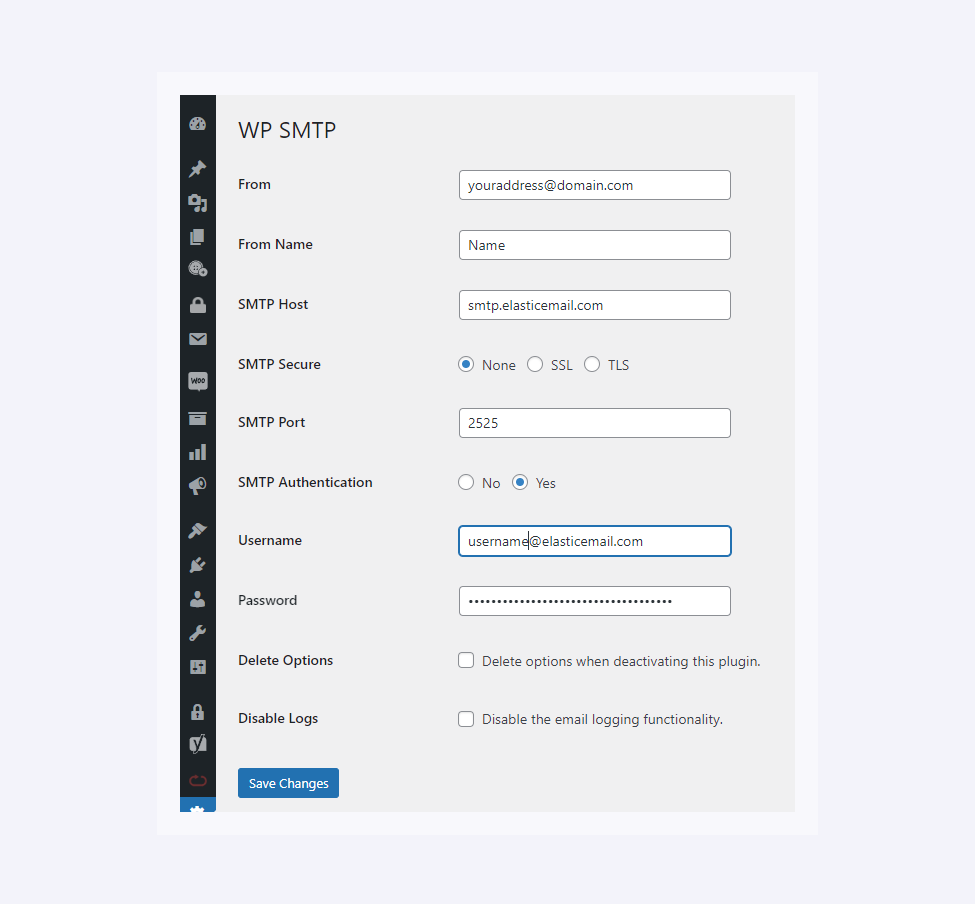
In Settings, you can insert your “From” address, your “From” name, as well as your SMTP Host, which is smtp.elasticemail.com, and port. You can find the SMTP port on your Elastic Email account. Also, you need to enable the SMTP Authentication and insert your Username and Password. Once you click Save Changes, your configuration will be completed.
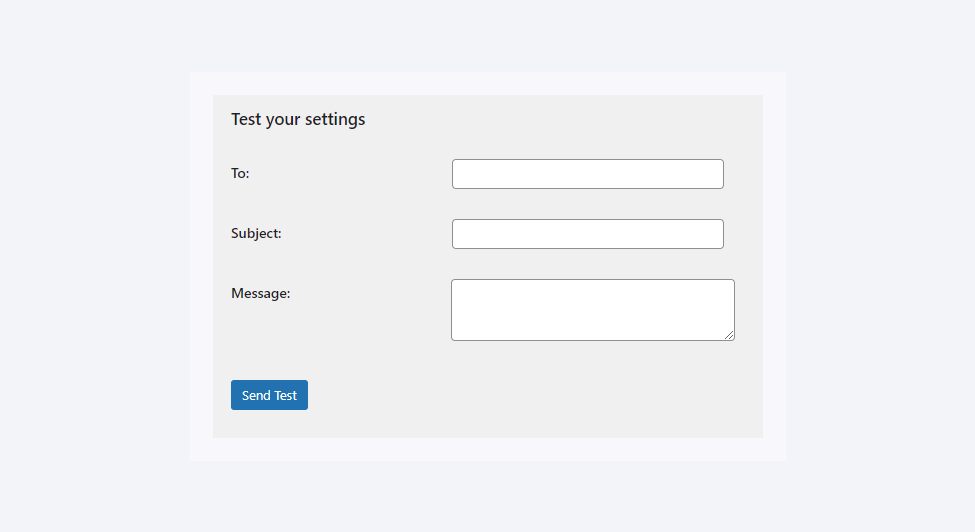
You can also test your settings below by inserting the “To” address, subject, and message.
PrestaShop
When you want to send transactional emails from your PrestaShop store via SMTP, you need to log into the Back Office of your store, choose Advanced Parameters, and then E-mail.
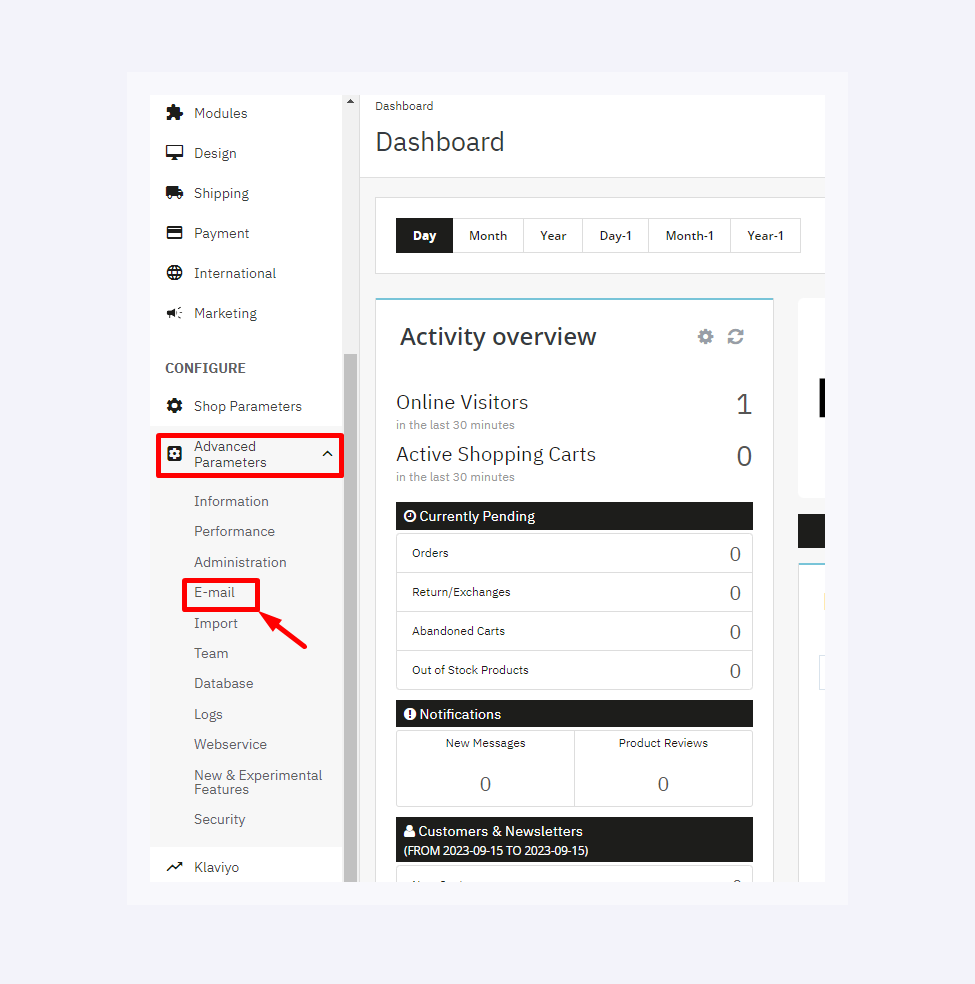
Once you enter the E-mail settings, you can insert your SMTP credentials there. You need to choose the option Set my own SMTP parameters. Then, you will see the input boxes to add your email domain, SMTP server, username, password, encryption, and port.
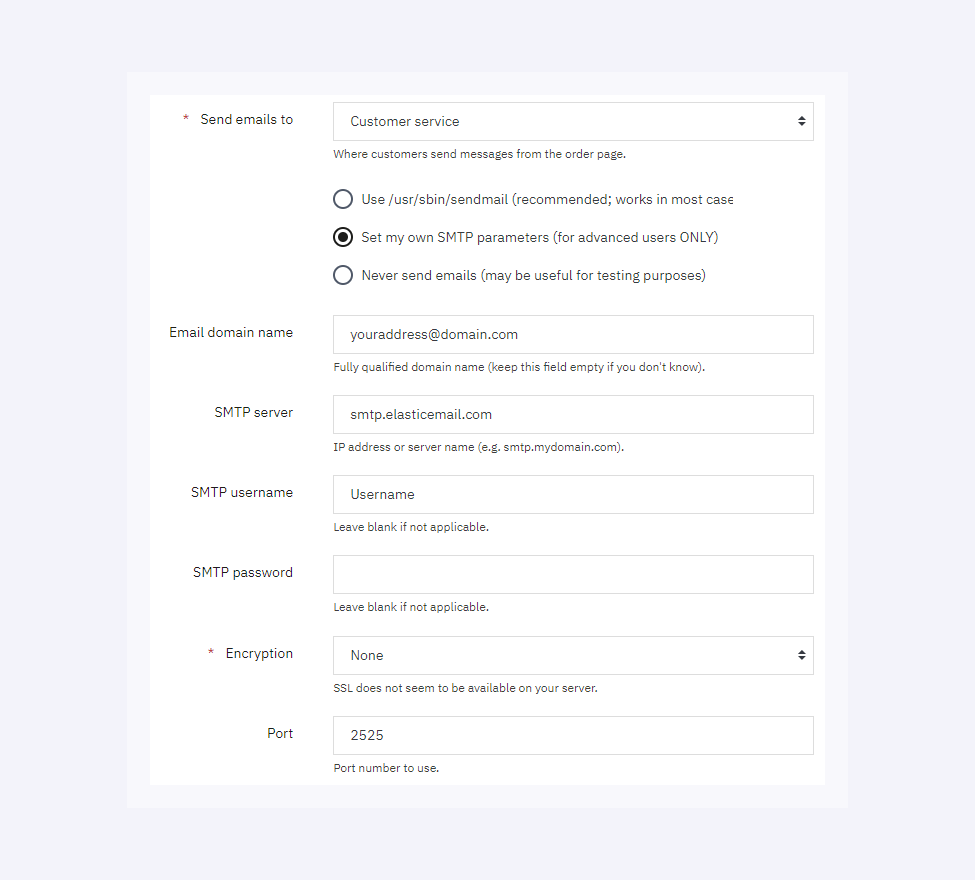
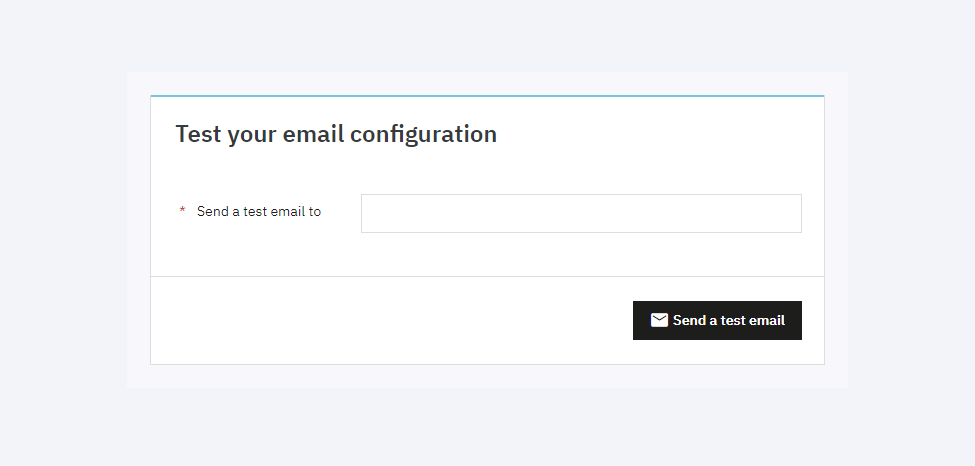
Next, you can set up other settings, such as Log Emails and DKIM signing. Once you click Save, your SMTP configuration will be completed. You can also test your settings in the section below by providing the “To” address.
Conclusion
Choosing an SMTP provider allows you to send transactional emails directly from your e-commerce store when your platform does not include the email-sending feature. We hope the above examples will help you configure your communication via SMTP and the integration process will be easy and seamless.
If you need assistance integrating Elastic Email with your e-commerce store, you can contact our Customer Support.

Ula Chwesiuk
Ula is a content creator at Elastic Email. She is passionate about marketing, creative writing and language learning. Outside of work, Ula likes to travel, try new recipes and go to concerts.